Week 3 | Long Time Gone Sew-along | Crosses of the U.K. block
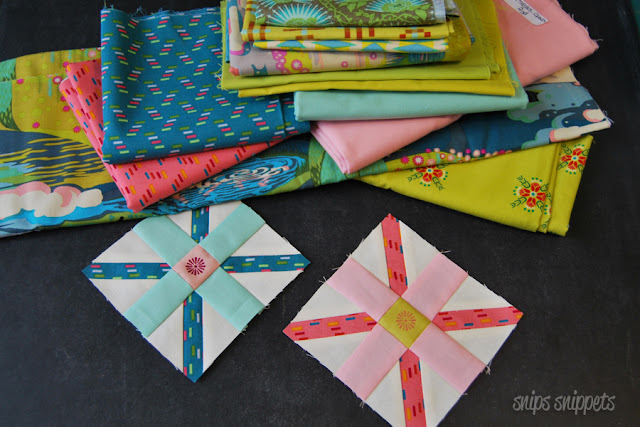
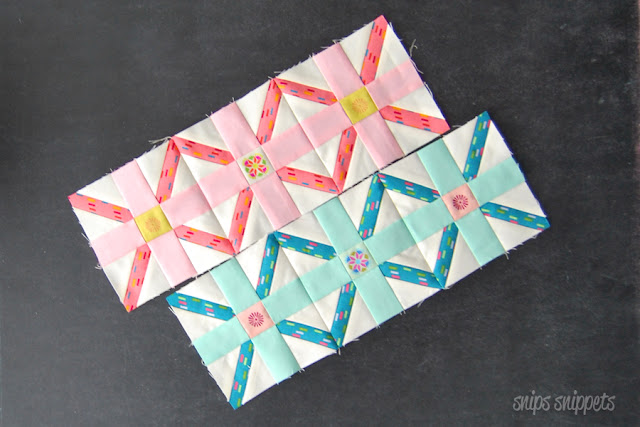
Hello and welcome everyone! We've moved into week three of the Long Time Gone Sew-along and I have to say, the blocks you guys are making are just gorgeous! Today's block is a fun one that gives a little bit of room for some cute fussy cuts! Say hello to the Crosses of the U.K block!!
I love the X`s in the background of the block and couldn't resist cutting my prints to maximize the directional feel of them!
Before we get into the tutorial details I wanted to take a moment to add some clarification for those that may be wondering the same questions as those that have asked via social media and email.
Angie and I will be alternating tutorials for the duration of the sew-along and today's block just happens to be hers. So pop on over and see what she has in store for you by clicking here!
Don’t forget Marti Michell is also offering a conversion chart and tutorial on how to make this block using her templates. See Marti’s tutorial and get the conversion chart by clicking here.
I love the X`s in the background of the block and couldn't resist cutting my prints to maximize the directional feel of them!
Before we get into the tutorial details I wanted to take a moment to add some clarification for those that may be wondering the same questions as those that have asked via social media and email.
- Anyone found providing the measurements for blocks in their social media captions and comments, or website, or Facebook will be disqualified from entry into the prize pool (this applies to also encouraging people to email you or message you for the details). Anyone found to be providing alternate patterns for making the blocks (such as foundation paper pieced patterns) will be disqualified from the prize pool. You can make and use them yourself but sharing them is in violation of this competition and it’s just plain disrespectful to all the hard work that the pattern designer has done. You need to buy the pattern to be in the running for the wonderful prizes on offer.
- The timeframe for entering your blocks for consideration in the prize draw is 12:01am on Wednesday in your timezone and 11:59pm on Tuesday in your timezone. The dates will obviously be respective of what block we’re on and I cannot stipulate enough that the free downloadable tracker (click here to download) is your best friend when it comes to keeping this straight. We will post on social media reminders about it, but it’s up to you to make sure you’ve entered your block on time.
- The extension of entry for the prize pool only applied to the first block (and has now passed) and did not impact nor apply to any other block.
Angie and I will be alternating tutorials for the duration of the sew-along and today's block just happens to be hers. So pop on over and see what she has in store for you by clicking here!
Don’t forget Marti Michell is also offering a conversion chart and tutorial on how to make this block using her templates. See Marti’s tutorial and get the conversion chart by clicking here.
On
the days I'm not providing you with tutorials, I'm hoping to be able to
share in some tips and tricks I used for the current block or maybe
just some pretty pictures!
I'll
be fussy cutting for a great portion of my blocks as well as placing my
pieces in kaleidoscope"esk" positions, so I'll have some methods that I
like to use that I'll share with you all!
So for today I thought we could chat a bit about directional prints and how to use them in your blocks.
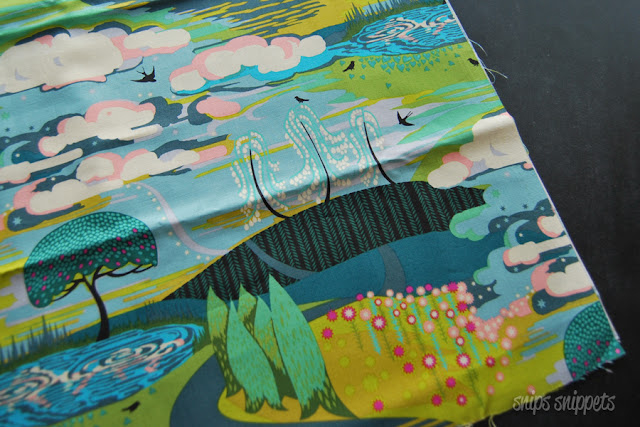
For those that don't know, a directional print is one where the design has been printed with an obvious direction to it. Some prints have a very clear direction to them like the print below.
This print (Enchanted by Anna Maria Horner) is very clearly directional, it has a definite top and bottom to the print when viewed as a whole. Because of the large scale of the print though, it can still work, when cut into smaller pieces, as non directional.
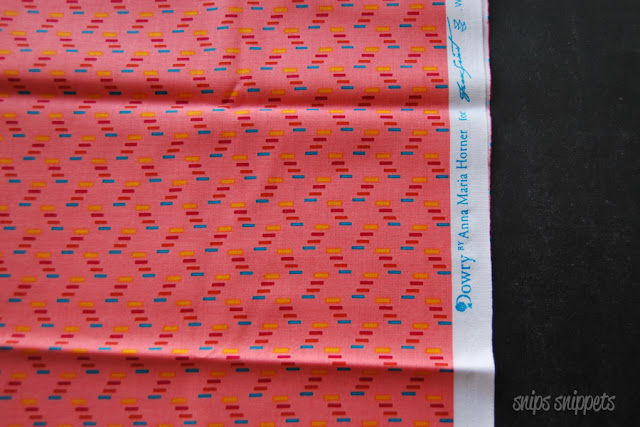
When working with a directional print that is smaller in scale such as the Cracking Codes print (also AMH) below,
Regardless of how small you cut the pieces it still reads as directional. And this is where you want to make sure to cut your pieces all in the same direction. Nothing worse than getting your block sewn together to find one piece of print running the wrong way! And while there is nothing wrong with the direction of the prints running in different ways, the block will ultimately look more cohesive when the print runs in the same direction.
Wow! How many times can I use the word direction in one paragraph!!
So when making these blocks I made sure to cut all the prints with the direction of the fabric running the same way. This helps with the movement of the block.
Play around with the direction before cutting out your pieces, this way you can get a better idea of which direction you want the print to run. To do this just lay out your fabric and grab two pieces of blank paper or white scraps and lay them on top of the fabric. You want to space the paper/scraps far enough apart to emulate the size of the piece you will be cutting.
(Ignore the ruler in the shot, my paper wouldn't lay flat so the ruler is holding it in place!)
So this gives you a bit of an idea of how the fabric will look when cut out. But what if you didn't like the dashes running along like this?
Rotate your papers/scraps and see what it would look like if you cut vertically instead of horizontally. It makes a big difference doesn't it! You can even line up your paper to a diagonal in the print and cut that way!
Just remember when cutting on the bias your pieces will have a fair bit of stretch to them, so pin your pieces when sewing together!
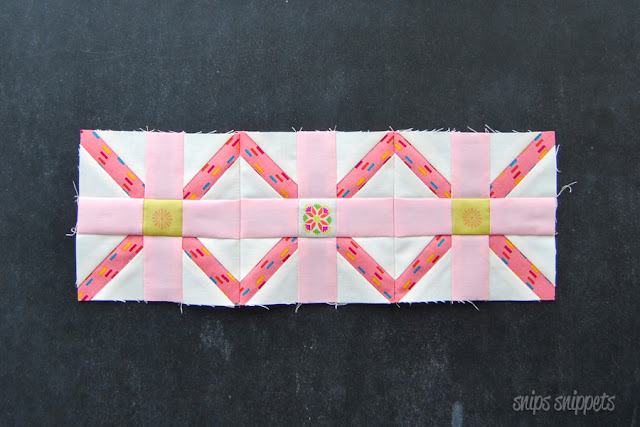
While making these blocks I played with the idea of using the print for the + part of the block and the solid for the x portion. In the end I swapped them out and I like the effect better with the darker print in the background. It plays up the lattice effect the x's make when connected.
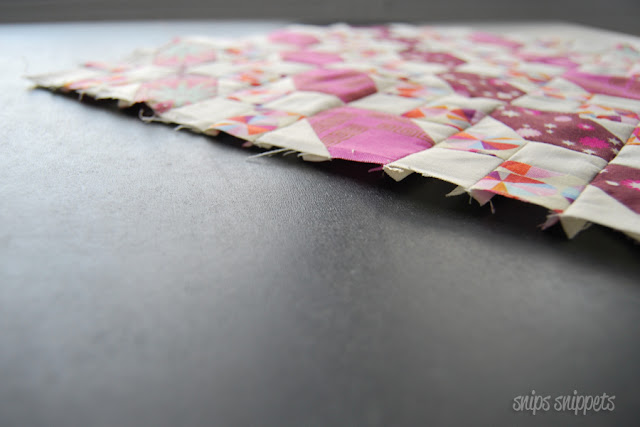
Who wants to see my backside now?!! Words that really shouldn't ever be uttered on the internet! The backside of my block I mean! Pressing issues at hand here!
There is no right or wrong way to press, there is no quilt police and you won't have your quilters license revoked for pressing in a way that some think is a faux pas. I'm a firm believer in pressing the way the fabric wants to go. Now if I need to re-position my blocks to better suit the pressing needs I will if I can. The most important think to remember when pressing (other than not touching the hot iron!) is to be consistent. Press all the same pieces of your blocks the same way. As for pressing your sewn blocks together I generally press to the side if I'm going to be attaching rows of the same blocks, that way I can nest my seams when sewing the rows together. But when sewing a project like this where the blocks are all different sizes going together I press open to keep things flat.
If you send your quilts out to be quilted though you may want to check with your long armer and see what method of pressing they prefer for quilting. In which case please disregard all the pressing needs here today and listen to your quilter!
Well my friends, I think that is all the sage wisdom I have for you today! I'll leave you again with some technical details about how to win prizes and such, and of course a sneaky peak of next weeks block!
And don't forget, Angie is the girl with the goods this week! Head on over to her blog for today's tutorial and to see all her Alison Glass eye candy, by clicking here!
Again, If you're using the Marti Michell Perfect Patchwork Templates you can find the conversion chart by clicking here.
We've made it as simple as possible for you to win. To be eligible for all prizes on offer all you have to do is:
High fives to all of you and your amazing Square in a Square Stars blocks last week!
So for today I thought we could chat a bit about directional prints and how to use them in your blocks.
For those that don't know, a directional print is one where the design has been printed with an obvious direction to it. Some prints have a very clear direction to them like the print below.
This print (Enchanted by Anna Maria Horner) is very clearly directional, it has a definite top and bottom to the print when viewed as a whole. Because of the large scale of the print though, it can still work, when cut into smaller pieces, as non directional.
When working with a directional print that is smaller in scale such as the Cracking Codes print (also AMH) below,
Regardless of how small you cut the pieces it still reads as directional. And this is where you want to make sure to cut your pieces all in the same direction. Nothing worse than getting your block sewn together to find one piece of print running the wrong way! And while there is nothing wrong with the direction of the prints running in different ways, the block will ultimately look more cohesive when the print runs in the same direction.
Wow! How many times can I use the word direction in one paragraph!!
So when making these blocks I made sure to cut all the prints with the direction of the fabric running the same way. This helps with the movement of the block.
Play around with the direction before cutting out your pieces, this way you can get a better idea of which direction you want the print to run. To do this just lay out your fabric and grab two pieces of blank paper or white scraps and lay them on top of the fabric. You want to space the paper/scraps far enough apart to emulate the size of the piece you will be cutting.
(Ignore the ruler in the shot, my paper wouldn't lay flat so the ruler is holding it in place!)
So this gives you a bit of an idea of how the fabric will look when cut out. But what if you didn't like the dashes running along like this?
Rotate your papers/scraps and see what it would look like if you cut vertically instead of horizontally. It makes a big difference doesn't it! You can even line up your paper to a diagonal in the print and cut that way!
Just remember when cutting on the bias your pieces will have a fair bit of stretch to them, so pin your pieces when sewing together!
While making these blocks I played with the idea of using the print for the + part of the block and the solid for the x portion. In the end I swapped them out and I like the effect better with the darker print in the background. It plays up the lattice effect the x's make when connected.
Who wants to see my backside now?!! Words that really shouldn't ever be uttered on the internet! The backside of my block I mean! Pressing issues at hand here!
There is no right or wrong way to press, there is no quilt police and you won't have your quilters license revoked for pressing in a way that some think is a faux pas. I'm a firm believer in pressing the way the fabric wants to go. Now if I need to re-position my blocks to better suit the pressing needs I will if I can. The most important think to remember when pressing (other than not touching the hot iron!) is to be consistent. Press all the same pieces of your blocks the same way. As for pressing your sewn blocks together I generally press to the side if I'm going to be attaching rows of the same blocks, that way I can nest my seams when sewing the rows together. But when sewing a project like this where the blocks are all different sizes going together I press open to keep things flat.
If you send your quilts out to be quilted though you may want to check with your long armer and see what method of pressing they prefer for quilting. In which case please disregard all the pressing needs here today and listen to your quilter!
Well my friends, I think that is all the sage wisdom I have for you today! I'll leave you again with some technical details about how to win prizes and such, and of course a sneaky peak of next weeks block!
And don't forget, Angie is the girl with the goods this week! Head on over to her blog for today's tutorial and to see all her Alison Glass eye candy, by clicking here!
Again, If you're using the Marti Michell Perfect Patchwork Templates you can find the conversion chart by clicking here.
Prize Winning Details
Of course the ultimate prize is making this amazing quilt, but if you'd like to also throw your hat in the ring to win some amazing prizes from our amazing sponsors then here's the information you need to know. You can find out more about our sponsors and the prizes on offer by clicking here.We've made it as simple as possible for you to win. To be eligible for all prizes on offer all you have to do is:
- Post a photo of at least ONE of this week's blocks to your Instagram account between 29 March and 11:59pm 4 April 2017 in your timezone.
- Tag your photo with the hashtags #LongTimeGoneSAL #AlisonGlass #AndoverFabrics #SewWithTheBest #AnnaMariaHorner #FreeSpiritFabrics #JenKingwell #LongTimeGoneQuilt #AmitieTexiles #MartiMichell #LovePatchworkQuilting
- Be Following these accounts on Instagram:
- @GnomeAngel
- @SnipsSnippets
- @AlisonGlass
- @AnnaMariaHorner
- @JenKingwell
- @AndoverFabrics
- @FreeSpiritFabrics
- @MartiMichell
- @LoveQuiltingMag
You will also need to do the following:
- Post a photo of each of the blocks in their relevant weeks in your timezone. You can find the block timetable by clicking here.
- Complete the quilt top and post it to Instagram within 12 July and Midnight 21 July in your timezone.
- All photos will need to have the relevant hashtags on them.
- You will need to be following all the relevant Instagram accounts at the time of the drawing.
Need help keeping all of that clear in your head, Angie has made up a fabulous Long Time Gone SAL Tracker, you can grab it by clicking here to download.
For more information you can find commonly asked questions and their answers by clicking here.




I am chuckling because I almost always prefer the look of directional prints going in different directions - just too organized and planned looking the other way. But sometimes no matter how careful I am they often end up facing the same way. My guess is that you experience the opposite:) Funny how that works. That being said - I am glad that you specified what works the best for most people.
ReplyDeleteA very pretty block in lovely colour choices =)
ReplyDeleteI love the calm you bring to this pattern with a plain, unifying solid. And the pared-back palette you use for each block.
ReplyDelete